Using Github Actions to run automated tests and deployment to AWS EC2 with CodeDeploy.


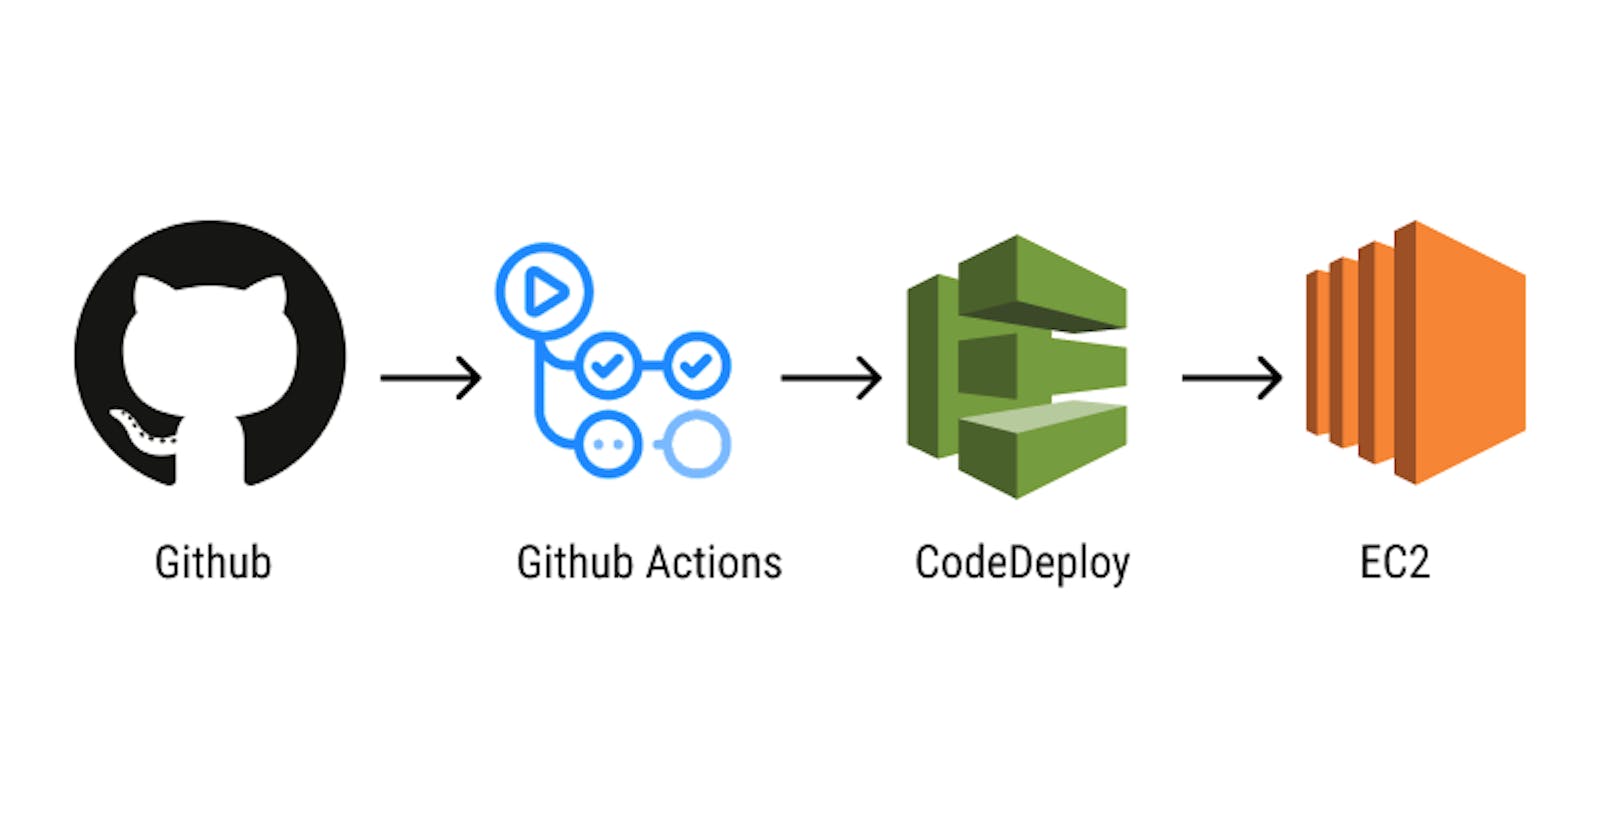
Automation is the heart of building a modern Continuous Integration and Continuous Delivery (CI/CD) pipeline or workflow and helps saves time and effort for the development and operations team allowing them to focus on building great features. In this article we would be exploring how to setup a CI/CD pipeline using Github Actions. I chose to use Github Actions because the project repository was hosted on Github and I wanted to explore the newly added Github Actions feature. We would be using AWS CodeDeploy because the application servers are hosted on AWS EC2 instances.
Prerequisites
These are required to setup the pipeline using the steps described in this article:
- AWS access keys with AWS CodeDeploy and AWS S3 access.
- Two identical AWS EC2 instances with a running PM2 cluster on each.
- Administrator access to the project's Github repository.
- AWS CLI
Our application would be called api-server. Before we begin, we need to plan how we intend to implement this automation setup. It should be noted that the workflow used by the development team is the Gitflow workflow. What we intend to achieve is an automated pipeline that runs tests on push to every branch, deploys to the staging server after tests pass on the develop branch and deploys to the production server afters tests pass on the master branch.
CodeDeploy
We'll be using CodeDeploy for this setup so we have to create a CodeDeploy application for our project and two deployment groups for the application. One for staging and the other for production. Deployment groups are a set of individual EC2 instances or lambda functions our application would be deployed to. Creating these AWS resources can be done using the AWS Console but in this article we'll be using the CLI to create AWS resources.
To create the api-server CodeDeploy application using AWS CLI, we run this on our terminal:
aws deploy create-application \
--application-name api-server \
--compute-platform Server
Deployment Groups
Next, we create the deployment groups for our application. Before we can proceed to create a deployment group we need to create a Service Role for CodeDeploy using IAM and attach the AWSCodeDeployRole (As stated previously, this can be easily done using the AWS console but we'll be using the CLI through out this article). Before we run the cli command to create the service role, we need to create a file with IAM specifications for the role, copy the content below into it and name it CodeDeployDemo-Trust.json
{
    "Version": "2012-10-17",
    "Statement": [
        {
            "Sid": "",
            "Effect": "Allow",
            "Principal": {
                "Service": [
                    "codedeploy.amazonaws.com"
                ]
            },
            "Action": "sts:AssumeRole"
        }
    ]
}
We can now create the role by running:
aws iam create-role \
--role-name CodeDeployServiceRole \
--assume-role-policy-document file://CodeDeployDemo-Trust.json
After the role is created we attach the AWSCodeDeployRole policy to the role
aws iam attach-role-policy \
--role-name CodeDeployServiceRole \
--policy-arn arn:aws:iam::aws:policy/service-role/AWSCodeDeployRole
To create a deployment group we would be needing the service role ARN. This can be gotten from the output of the create-role command but we can run the command below to get it again.
aws iam get-role \
--role-name CodeDeployServiceRole \
--query "Role.Arn" \
--output text
The ARN should look something like arn:aws:iam::[account-number]:role/CodeDeployServiceRole.
Phew! Creating a service role with the AWS CLI took more steps than I thought it would. Let's go on to create a deployment group for the staging environment.
aws deploy create-deployment-group \
--application-name api-server \
--deployment-group-name staging \
--service-role-arn arn:aws:iam::[account-number]:role/CodeDeployServiceRole \
--ec2-tag-filters Key=Name,Value=staging,Type=KEY_AND_VALUE
To create deployment group for the production environment we just need to duplicate the step above and change the --deployment-group-name to production and the --ec2-tag-filters to Key=Name,Value=production,Type=KEY_AND_VALUE
AppSpec File
We've created our CodeDeploy application with the necessary deployment groups. The next stage is to setup our appspec file. An AppSpec file is used by CodeDeploy to manage deployments. It can be in either JSON or YAML. We'll be using the YAML format to setup some hooks to deploy our application and validate the deployment.
Create a file named appspec.yml in the project directory and paste this content into it:
version: 0.0
os: linux
files:
  - source: .
    destination: /srv/api-server
hooks:
  AfterInstall:
    - location: scripts/reload_pm2.sh
      timeout: 300
      runas: ubuntu
  ValidateService:
    - location: scripts/validate_service.sh
      timeout: 300
Let's break down the appspec file down. The files section contains an array of objects to specify source and destination for application files. These can be modified to suit other applications and server locations. The hooks specify actions to be taken during the deployment process. For this deployment, we would be using the AfterInstall and the ValidateService hooks. The runas key specifies the server user account to run the scripts as.
The AfterInstall hook runs a script after the deployment artifacts are sent to the server. This is usually used to start the application. Our current application uses a PM2 cluster so we can perform a no downtime deployment by reloading the running process. The content of the scripts/reload_pm2.sh file looks like this.
#!/bin/bash
pm2 reload api-server
It's just a command to reload the api-server process (you would need to name the process on an initial deploy using pm2).
The ValidateService hook runs after every thing has been set up to test that the service runs fine. In this case we would use curl and grep to validate a text appears in the return value of an endpoint but you can use any form of validation you find necessary. The content of the scripts/validate_service.sh should look like this for this deployment:
#!/bin/bash
curl -v --silent localhost:3000 2>&1 | grep success
Github Actions
As we discussed, we would be using Github Actions to setup the CI/CD pipeline. First step is to create the workflow file and setup the automated tests. To create the workflow file, create a .github folder in the project repository and create a workflows sub folder in the .github folder. The workflows folder would contain yaml configurations for Github Actions. Next up, we'll create a workflow file. I'll call this one ci-cd.yml and add the test job to run tests.
name: CI/CD

on: push

jobs:
  test:
    runs-on: ubuntu-latest
    steps:
    - uses: actions/checkout@v1
    - name: Install Node.js
      uses: actions/setup-node@v1
      with:
        node-version: '10.x'
    - name: Install npm dependencies
      run: npm install
    - name: Run tests
      run: npm run test
This test job would be ran on every push to any branch of the Github repository. It uses the actions/checkout@v1 to checkout the current repository's branch and uses actions/setup-node@v1 to setup a node environment to run scripts in. The job then installs the project dependencies and runs the test script.
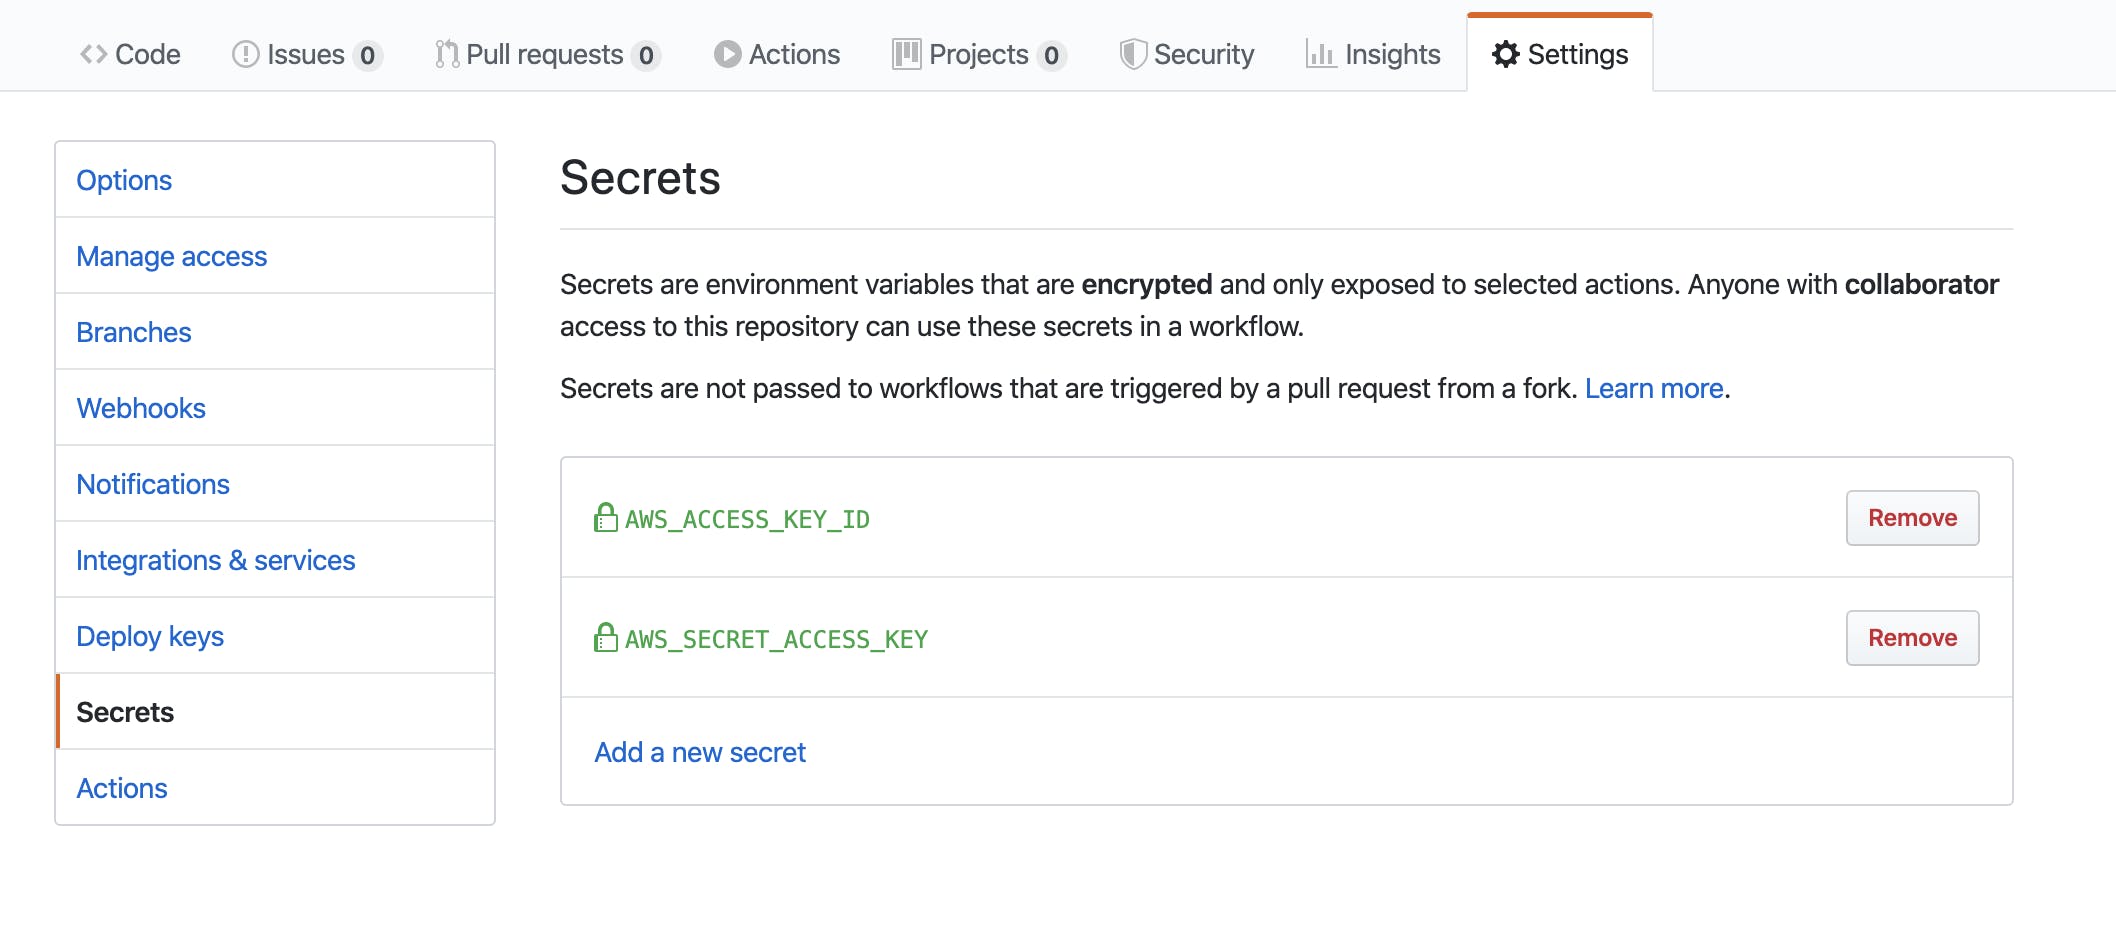
The next job we would configure is the staging-deploy job. To configure this job to perform actions on our AWS account we need to save our AWS_ACCESS_KEY_ID and AWS_SECRET_ACCESS_KEY as secrets on our Github repository so we can gain access to them in the job.
After secrets have been updated we can go ahead to add the code for the staging-deploy job.
# ... test job config

staging-deploy:
    runs-on: ubuntu-latest
    needs: [test]
    if: github.ref == 'refs/heads/develop'
    steps:
    - uses: actions/checkout@v1
    - name: Install Node.js
      uses: actions/setup-node@v1
      with:
        node-version: '10.x'
    - name: Install npm dependencies
      run: npm install
    - name: AWS Deploy push
      uses: ItsKarma/aws-cli@v1.70.0
      env:
        AWS_ACCESS_KEY_ID: ${{ secrets.AWS_ACCESS_KEY_ID }}
        AWS_SECRET_ACCESS_KEY: ${{ secrets.AWS_SECRET_ACCESS_KEY }}
        AWS_DEFAULT_REGION: "us-east-2"
      with:
        args: >-
          deploy push
          --application-name api-server
          --description "This is a revision for the api-server"
          --ignore-hidden-files
          --s3-location s3://deployments/staging-api-server.zip
          --source .
    - name: AWS Create Deploy
      uses: ItsKarma/aws-cli@v1.70.0
      env:
        AWS_ACCESS_KEY_ID: ${{ secrets.AWS_ACCESS_KEY_ID }}
        AWS_SECRET_ACCESS_KEY: ${{ secrets.AWS_SECRET_ACCESS_KEY }}
        AWS_DEFAULT_REGION: "us-east-2"
      with:
        args: >-
          deploy create-deployment
          --application-name api-server
          --deployment-config-name CodeDeployDefault.OneAtATime
          --deployment-group-name staging
          --file-exists-behavior OVERWRITE
          --s3-location bucket=deployments,key=staging-api-server.zip,bundleType=zip
For this deployment job we need it to wait for the test job to pass before proceeding to run the deployment so we add needs: [test]. We also need it to be ran only on push to the develop branch so we use an if clause to implement the check. This job steps starts out with steps similar to that of the test job because we still need to checkout the repository code and install dependencies. Things get a little different on the AWS Deploy push step. In this step we need to use the AWS CLI to push the application code as a deployment artifact to an S3 bucket. To ease the step of setting up a profile for aws cli, I used ItsKarma/aws-cli@v1.70.0 and used the AWS credentials saved as secrets as environment variables. The AWS Create Deploy step creates a deployment to the staging deployment group.
To setup the production-deploy job we would duplicate the staging-deploy job and modify the deployment group to production and change the S3 bucket. The complete ci-cd.yaml file should look like this:
name: CI/CD

on: push

jobs:
  test:
    runs-on: ubuntu-latest
    steps:
    - uses: actions/checkout@v1
    - name: Install Node.js
      uses: actions/setup-node@v1
      with:
        node-version: '10.x'
    - name: Install npm dependencies
      run: npm install
    - name: Run tests
      run: npm run test

  staging-deploy:
    runs-on: ubuntu-latest
    needs: [test]
    if: github.ref == 'refs/heads/develop'
    steps:
    - uses: actions/checkout@v1
    - name: Install Node.js
      uses: actions/setup-node@v1
      with:
        node-version: '10.x'
    - name: Install npm dependencies
      run: npm install
    - name: AWS Deploy push
      uses: ItsKarma/aws-cli@v1.70.0
      env:
        AWS_ACCESS_KEY_ID: ${{ secrets.AWS_ACCESS_KEY_ID }}
        AWS_SECRET_ACCESS_KEY: ${{ secrets.AWS_SECRET_ACCESS_KEY }}
        AWS_DEFAULT_REGION: "us-east-2"
      with:
        args: >-
          deploy push
          --application-name api-server
          --description "This is a revision for the api-server"
          --ignore-hidden-files
          --s3-location s3://deployments/staging-api-server.zip
          --source .
    - name: AWS Create Deploy
      uses: ItsKarma/aws-cli@v1.70.0
      env:
        AWS_ACCESS_KEY_ID: ${{ secrets.AWS_ACCESS_KEY_ID }}
        AWS_SECRET_ACCESS_KEY: ${{ secrets.AWS_SECRET_ACCESS_KEY }}
        AWS_DEFAULT_REGION: "us-east-2"
      with:
        args: >-
          deploy create-deployment
          --application-name api-server
          --deployment-config-name CodeDeployDefault.OneAtATime
          --deployment-group-name staging
          --file-exists-behavior OVERWRITE
          --s3-location bucket=deployments,key=staging-api-server.zip,bundleType=zip

  production-deploy:
    runs-on: ubuntu-latest
    needs: [test]
    if: github.ref == 'refs/heads/master'
    steps:
    - uses: actions/checkout@v1
    - name: Install Node.js
      uses: actions/setup-node@v1
      with:
        node-version: '10.x'
    - name: Install npm dependencies
      run: npm install
    - name: AWS Deploy push
      uses: ItsKarma/aws-cli@v1.70.0
      env:
        AWS_ACCESS_KEY_ID: ${{ secrets.AWS_ACCESS_KEY_ID }}
        AWS_SECRET_ACCESS_KEY: ${{ secrets.AWS_SECRET_ACCESS_KEY }}
        AWS_DEFAULT_REGION: "us-east-2"
      with:
        args: >-
          deploy push
          --application-name api-server
          --description "This is a revision for the api-server"
          --ignore-hidden-files
          --s3-location s3://deployments/production-api-server.zip
          --source .
    - name: AWS Create Deploy
      uses: ItsKarma/aws-cli@v1.70.0
      env:
        AWS_ACCESS_KEY_ID: ${{ secrets.AWS_ACCESS_KEY_ID }}
        AWS_SECRET_ACCESS_KEY: ${{ secrets.AWS_SECRET_ACCESS_KEY }}
        AWS_DEFAULT_REGION: "us-east-2"
      with:
        args: >-
          deploy create-deployment
          --application-name api-server
          --deployment-config-name CodeDeployDefault.OneAtATime
          --deployment-group-name production
          --file-exists-behavior OVERWRITE
          --s3-location bucket=deployments,key=production-api-server.zip,bundleType=zip
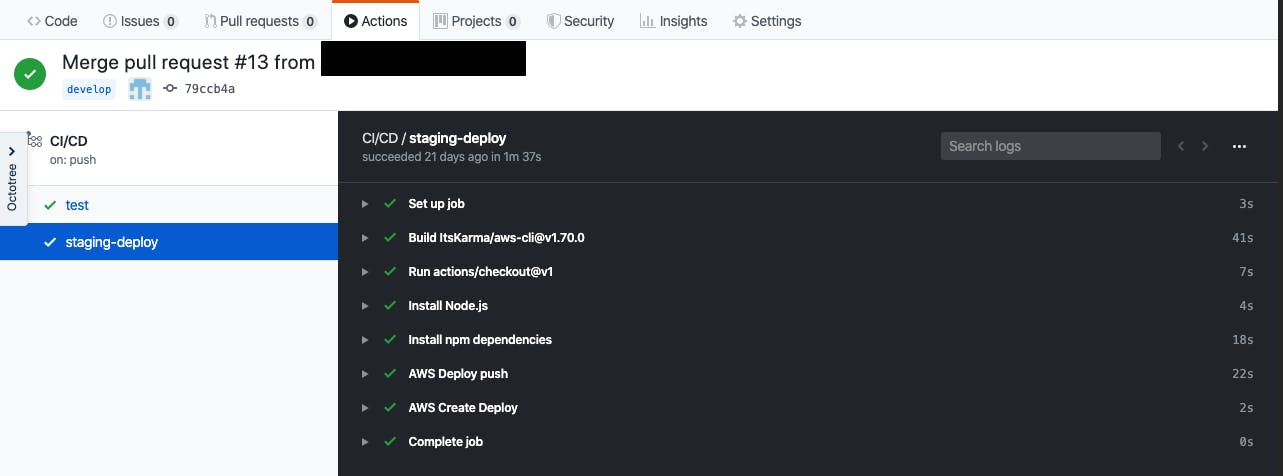
With these in place, our Github Action workflow is ready to deploy application changes to our servers automatically. 😁